The Hull flow transfer tunnel was constructed for Yorkshire Water to direct sewage flows to a new treatment works, allowing compliance with the European Union’s Urban Wastewater Treatment Directive. Miller Civil Engineering (MCEL), now Morgan EST, was commissioned to design and construct the works, with Arup appointed as project manager. The total scheme value for the tunnel was US$122M.
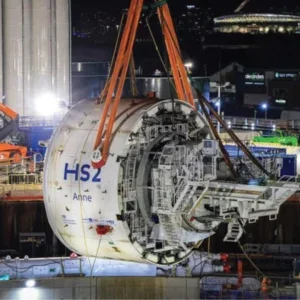
The Conditions of Contract were based on the Institution of Chemical Engineers (IchemE) Model form for Process Plant, Greenbook, which provided a target cost reimbursable contract incorporating ‘painshare’ and ‘gainshare’ incentives. The 8.4km transfer tunnel, located along the north bank of the River Humber, was designed to allow untreated effluent to flow by gravity from the existing system to a new treatment works. The 3.6m i.d. tunnel was bored using an EPB TBM. The tunnel was lined with a pre-cast segmental lining comprising a 250mm thick, six piece reinforced tapered ring, fitted with EPDM gaskets.
Ground conditions surrounding the tunnel comprise alluvial and glacial deposits. The alluvial deposits consist of clay, silt, sand, gravel and peat, which lie conformably on the glacial deposits comprising clay, fine to medium sand and gravel. The Upper Chalk is at depth beneath the tunnel, and rests un-conformably with the glacial deposits.
Two aquifers are present along the route. The upper, hydrostatic, aquifer is approximately 2m below ground level. The second is tidal, situated beneath the laminated clays, in the lower glacial deposit and chalk.
The collapse
At 00.30hrs on 16 November 1999, a locomotive driver reported signs of water inflow at a segment joint, which was carrying fine sand into the tunnel, at a point some 200m behind the face of the TBM. Despite efforts by the tunnel gang to stem the flow of material, water and sand inflow levels rapidly increased and the tunnel became destabilised.
At 03.00hrs the same day, the tunnel was evacuated and subsequently collapsed. The collapse was focused some 6m to the east of a maintenance shaft, known as T3 (Figure 1). Immediately following the collapse the nearby A63 road was closed and properties in the proximity evacuated; both as a precautionary measure.
At the location of the collapse, the ground surface sank by some 2.5m within a depression some 60m in diameter and it was calculated that approximately 2000m³ of ground entered the tunnel. In total, approximately 100m of tunnel was affected by the collapse and required reconstruction.
Artificial ground freeze
Several options, including tunnel diversion, cofferdam construction, jet grouting and artificial ground freeze were reviewed for the reconstruction of the tunnel. With the exception of tunnel diversion, all options considered involved stabilising the ground and reconstructing the collapsed section of tunnel along its original alignment.
Supporting the ground by Artificial Ground Freeze (AGF) and forming the tunnel with a Sprayed Concrete Lining (SCL) was adopted, as this was deemed to provide the optimum solution when considering the local ground conditions, safety, programme, buildability and cost. Liquid Nitrogen (LIN) was chosen as the freeze medium.
Three phases existed for the life of the ice structure at Hull, which is common to many civil engineering projects that implement AGF. The first phase was termed the Primary or Active Freeze Period and comprised the development of the freeze until it reached design thickness. The second phase was termed the Secondary or Passive Freeze Period and comprised maintaining the ice structure at design thickness during excavation. The final phase, termed the Thaw Period, occurred after the tunnel lining had reached its design strength.
The freeze system used at Hull was an open system, with LIN, which exists at approximately -196°C, being pumped into a series of freeze tubes. As the LIN passed through the freeze holes it warmed and boiled, as heat was removed from the ground, the resulting gas was released at an exhaust. The temperature of the gas at the exhaust formed the control for the system and was termed the Set Point.
Extensive testing of frozen soils taken from the post collapse recovery zone was undertaken to establish suitable parameters for the design of the frozen ground support structures. The design also took into account the highly disturbed ground conditions that existed around the collapse.
Finite Element analysis (FE) was used to design the ice structure, using data from the extensive testing. The FE demonstrated that each freeze tube had to provide a 750mm freeze radius giving a 1.5m diameter cylinder of ice around each tube. On this basis, the freeze tubes were installed at a maximum 750mm spacing (Figure 2).
Development and maintenance of freeze system
During the Primary Freeze, the Set Point was placed at a low temperature and once the ice structure reached design thickness, the Set Point was increased. Various temperatures were used for the Primary Freezes at Hull. Initially, low temperatures in the region of -140°C were used, as these achieved the designed ice thickness in the shortest time. Although using such low temperatures allowed excavation to commence quickly, within 14 days of switching on the system, the disadvantage was that it allowed high accumulation of cold energy within the excavation zone; this resulted in high compressive strengths of the soil matrix.
For the subsequent excavation stages, the Set Point was raised to the region of -120°C during the Primary Freeze; although this increased the lead-time for excavation to commence, the accumulation of cold energy in the excavation area reduced and prevented such high gains of compressive strength. Once the Primary Freeze was accomplished, the exhaust temperature was raised to the region of -90°C and then raised in 20°C increments. The Secondary Freeze exhaust temperature was never raised above -40°C.
To monitor the thickness of the ice structure during the Primary and Secondary freezes, monitoring holes, consisting of cased holes with thermocouple arrays, were positioned along the freeze tubes. Typically, one thermocouple for every 5m³ to 20m³ of frozen soil was used. Each thermocouple had a threshold temperature, which when reached indicated that the ice wall had reached its design thickness.
A pressure relief hole was used as an additional method to ensure that the excavation area was enclosed from the surrounding groundwater before excavation commenced. The pressure relief hole comprised a slotted pipe inserted the full length of the excavation and fitted with a ball valve and pressure gauge. Operation of the pressure relief hole was simple. Prior to excavation the relief hole was opened and if no water emitted the excavation area was sealed from the surrounding groundwater. The pressure relief hole also provided an indication of how the freeze was developing; the pressure of the water trapped in the excavation area increased as the ice structure developed; this pressure increase was monitored on the pressure gauge.
Cracks in first excavation phase
During the first excavation phase, cracks were observed in the tunnel face, radiating both further into the excavation and outwards towards the freeze pipes. As ground freezes, it initially expands, yet once a certain temperature has been attained, which is dependent on the ground conditions, it beings to shrink. As the ground within the excavation was excessively cold, a temperature of -105°C having been recorded, it was determined that the ground had begun to shrink and formed cracks. The cracks were not treated, as the ground was sufficiently cold that water entering the system would freeze before it reached the excavation area. The cracks were visually monitored for movement, as block failure had been identified as a low risk.
As previously mentioned, a Set Point of -140°C had been used for the initial construction stage. This caused a significant accumulation of cold energy in the ground that was not able to dissipate. The cracks were not encountered on the remaining stages when a warmer Set Point was used during the Primary Freeze.
Reconstruction of collapsed section
The reconstruction of the collapsed section of tunnel was conducted in five stages, with two to the west, and three to the east of Shaft T3. The five construction stages were referred to as West 1 (W1), West 2 (W2), East 1 (E1), East 2 (E2), and East 3 (E3). The length of the construction stages was governed by drilling constraints and ranged from approximately 20m to 25m in length. The tunnel axis was at a depth of 15m below ground level. The construction sequence to the east of the shaft is illustrated on Figure 3. The construction sequence to the west mimicked that to the east, but only had two construction stages.
Each construction stage was supported and closed to the surrounding ground and ground water horizontally with a circular ice wall and vertically with a frozen bulkhead. The bulkheads were constructed by drilling typically 23 vertical holes from the surface to below the level of the tunnel invert and freezing the surrounding ground. The horizontal freezes were constructed by drilling typically 33 horizontal or slightly inclined holes to the vertical bulkheads and freezing the surrounding ground.
Prior to drilling the horizontal freeze tubes, the freeze bulkheads were replaced with reinforced concrete structural bulkheads with a characteristic strength of 25N/mm². To allow the excavation of the first set of horizontal freeze tubes, bulkheads were formed at the tunnel eyes within the shaft.
The horizontal drill holes for all construction stages, except W2 and E3, splayed away from the tunnel centre line to allow an increase in the excavated diameter from 5.6m to 7.6m. This increase was to allow for the construction of a drill chamber within the tunnel to facilitate drilling of the next advance of horizontal freeze pipes. As the final construction stages (W2 and E3) did not require a drill chamber, the freeze tubes remained at a constant diameter.
To prevent the LIN flowing too quickly along the inclined freeze holes, they were fitted with weirs, typically at 3m intervals where the gradient was steep and 6m intervals where the gradient was gentle.
The freeze holes were drilled using directional drilling techniques. Once drilled, the holes were surveyed and an as built plot, to +/-0.5mm, accuracy was compiled. Additional freeze holes were drilled, as necessary. In general, between 1-3 freeze holes had to be re-drilled for each construction stage. Once drilled, the 95mm cased holes were fitted with 54mm copper tubing and were plumbed into the nitrogen supply. Where cold energy was not required to be dissipated, the freeze pipes were insulated, normally with rockwool or foam.
Excavation and tunnel lining
The choice of plant was limited as it was governed by the size of Shaft T3 (6m i.d.), which had been constructed as a maintenance shaft. A Schaeff roadheader, with the capability of using either a rotary cutter or a pneumatic breaker was used for excavation. In areas where the Schaeff could not be used, a smaller tracked machine with a breaker was utilised. Hand mining was used to trim the profile, yet was intentionally limited due to Hand Arm Vibration Syndrome, a condition aggravated by cold conditions.
Prior to commencement of the construction stages, four probe holes were drilled at 2m intervals along the tunnel drive, to identify if there were any isolated spots of saturated ground. The tunnel was then advanced in 1m sections, split into crown, bench and invert, with steel lattice girders used to maintain the tunnel profile. Following the completion of each 1m advance, a 300mm shotcrete primary lining was applied to the tunnel. The shotcrete mix had been designed following extensive trials in cold conditions and comprised an accelerated mix with steel fibres. The steel fibres were used to act as reinforcement to aid in crack prevention.
To aid in overcoming the cold conditions, the shotcrete was batched using heated aggregates and hot water. In addition a geocomposite insulating layer was attached to the side of the tunnel prior to spraying the shotcrete. These measures ensured that the concrete gained sufficient strength before the cold halted the cement hardening reaction. The primary lining had a design strength of 25N/mm² at 28 days.
Prior to spraying the secondary lining, the tunnel was heated and a waterproof membrane was applied. The 400mm shotcrete secondary lining comprised a steel reinforced shotcrete layer and was applied following the completion of the construction stage. The secondary lining had a design strength of 45N/mm² and was formed using the same mix as the primary lining, replacing the steel fibres with structural reinforcement.
The secondary lining was tested at 3, 7, and 28 days for strength, with five cores for every 100m² sprayed providing results were constant. If the results were not constant, five cores were tested every 50m², in accordance with the Method Statement.
Anomalies in excavation
Challenges faced during the excavation of the tunnel comprised the removal of a locomotive and the removal of the plates from the collapsed tunnel. The locomotive was abandoned in the vicinity of Shaft T3 during the collapse, and was cut up and removed in sections as excavation progressed.
The segments from the collapsed tunnel were removed as excavation progressed. In some instances, such as the epicentre of the collapse, the collapsed tunnel segments extended beyond the excavation zone and had to be carefully removed to ensure that the freeze wall was not ruptured. Occasionally, freeze holes pierced through the collapsed tunnel segments. In such instances, the segment had to be removed by cutting along the excavation profile with a diamond saw.
Monitoring
The monitoring regime at the ground surface was designed to confirm stability of the works from the excavation and to monitor the ground movements post collapse. The monitoring was conducted on a 24 hours basis during construction and gradually reduced to monthly readings. Within 24hrs of a freeze system being switched on, heave was noted at the ground surface in the order of 2mm-5mm. Total heave above frozen sections was of the order of 20mm.
Monitoring of the in-tunnel deformation was performed using precise 3D surveys of arrays of Bioflex targets, spaced along the tunnel at intervals of between 5m and 16m. Accuracy of the readings, which was affected by the quality of the targets and the atmospheric conditions in the tunnel, in particular the temperature, was ±0.5mm. The results of the deformation monitoring were processed using the Dedalos tunnel deformation program. This allowed the presentation of the vertical, transverse and longitudinal movements at each array to be plotted against time. The targets were positioned with one in the crown, two at shoulder and two at the knee. Following the installation of the secondary lining, the targets were repositioned and subsequently monitored.
The results from the monitoring were reviewed daily against the trigger, action, and evacuation levels, set at 0.3%, 0.7% and 1.3% strain respectively. These levels were devised from the initial design of the ice structure and related to the creep and the loss of compressive strength of the ground over time. Only in one instant did the convergence readings exceed 0.3%.
Monitoring of heave at tunnel level was conducted by monitoring the segmental tunnel adjacent to the collapsed section. A heave in the region of 30mm was recorded, which correlated with the predicted values.
Safety
A comprehensive safety system was installed, which included the normal rigorous safety procedures for working in confined spaces, in conjunction with incorporating systems for working in close proximity to Liquid Nitrogen.
A summary of the safety systems installed specifically for working in close proximity to LIN in a confined space, are given below:
Conclusions
A part of the success of the remedial works at Hull is attributed to the collaborative effort under taken by all those involved on the project, which comprised Yorkshire Water, Ove Arup and Partners, Miller Civil Engineering and their sister company Beton- Und Monierbau.
The project used challenging civil engineering techniques and it was essential that all parties involved worked together as a team.
Related Files
Figure 4
Figure 3
Figure 2
Figure 1
