The Thames Tideway Tunnel stretches over 25km from Acton in West London to Abbey Mills pumping station in Newham, where it connects onto the recently built Lee Tunnel. The tunnel is broken up into three sections; the west section delivered by BAM Nuttall, Morgan Sindall, Balfour Beatty (BMBJV); the central section delivered by Ferrovial and Laing O’Rourke (FLOJV); and finally, the east section, which is delivered by Costain, Vinci & Bachy (CVBJV). It will connect onto 34 of the most polluting overflow points, which will divert the sewage away from the river to the Beckton treatment works.
In late 2019, it was acknowledged that the most efficient methodology regarding the completion of FLOJV’s tunnel boring machine (TBM) drive toward BMBJV’s main drive site, Carnwath Road, would be to turn and bury the TBM. The west section JV was instructed to build a connection tunnel from the existing reception chamber at Carnwath Road to the Main Line Tunnel B joining the central and western sections of the Tideway tunnel; this connection tunnel became known as Main Line Tunnel B Connection Tunnel (MNTLB CT).
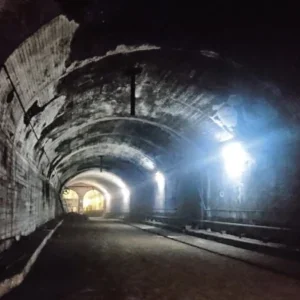
The connection tunnel is 76m in length, 8m internal diameter with a 350mm-thick sprayed concrete lining (SCL) connecting into the FLOJV segmental tunnel. Following SCL construction, 116m of tunnel secondary lining is cast, incorporating 40m of the existing FLOJV segmental tunnel.
The construction sequence was as follows: ground investigation/pumping trials were carried out to determine the potential requirement for a depressurisation system; all equipment for the tunnel construction was then mobilised and the existing reception chamber was reduced in diameter using sprayed concrete. Once the chamber thickening was complete, the 5.4m ID pilot tunnel was constructed, accompanied by an in-tunnel depressurisation scheme that was installed progressively during construction. The pilot was then removed, and the depressurisation scheme decommissioned during the construction of the 8m ID enlargement.
Once the enlargement reached the first permanent ring of the FLOJV segmental tunnel, it increased to 10.7m OD to form a collar around the pre-cast concrete ring – this became known as the flare. This was the most critical stage of construction as we excavated around the first permanent ring of the segmental tunnel, the integrity of which was vital to ensuring a sound connection between the SCL and segmental linings.
As tunnel agent, I found the MNTLB CT brought with it several complex challenges, from the design through to the planning and construction of the tunnel, all of which took place through the height of the pandemic. I was involved from the early stages of the design development , ensuring that the constructability of the tunnel was as practical as possible when it came to building it. In terms of planning and construction, there were several hurdles to overcome to ensure this new section of works did not have a major impact on the existing scope of works taking place at Carnwath Road; the TBM, tunnel demobilisation and set-up for the 6.4km of secondary lining in Main Tunnel A (MNTLA). The following report will detail these challenges and how they were overcome.
SITE INTERFACE WITH OTHER WORKS
Considering it is one of the main drive sites for one of the UK’s biggest infrastructure projects, Carnwath Road is an extremely small site. At 130m² in surface area, it was just about large enough to service the MNTLA TBM drive from Fulham to Acton. The initial scope of works was straight forward. Complete the TBM drive, remove the TBM at Acton while setting up for tunnel secondary lining works at Carnwath Road. One small site supplying and maintaining one major section of works was manageable but throwing a 76m long, 8m diameter SCL connection tunnel into the fold created a true challenge for the construction team. Collaboration and detailed planning between the two sections of work was imperative.
SURFACE DEPRESSURISATION
Firstly, the four bars of hydrostatic pressure created by the intermediate aquifer to the underside of the tunnel invert meant a depressurisation system was required to reduce the possibility of water ingress and ensure the invert was stable. Ground investigation (GI) works and a pump test were required to determine the most efficient dewatering system. To develop the design and create a depressurisation scheme, two boreholes (SP1 & 2) and two wellpoints (LG1 & 2) were installed.
These works were completed in April 2020 at the height of the covid pandemic. We used the pandemic as an opportunity to get slightly ahead of a very short design timeline for the depressurisation scheme development. I kept team numbers to a minimum and modified all Risk Assessment Method Statements (RAMS) to ensure strict covid regulations were being followed. This proved particularly difficult for the drilling teams as the two operatives had to work in close proximity when installing and removing augers. I worked closely with the sub-contractor weeks before mobilising to ensure all regulations were followed. To overcome the close working, we ensured that both operatives were in overnight accommodation together or were wearing sufficient Respiratory Protective Equipment (RPE) when working within 2m of each other. Rather than conventional face masks, we ordered Versaflo masks for the operatives. These are more convenient as there is no concern around safety glasses steaming up, which is a common occurrence when wearing face masks.
Based on the flow of water extracted from the well points via the pumping system, and the water level drawdown recorded during the pumping test, it was determined that the surface system would be made up of seven wells (including LG1/LG2) and a power / discharge point drilled through the existing MNTLB tunnel crown to be used for powering the in-tunnel system.
LG3-7 installation works commenced in July 2020, when all site operations were fully remobilised and the MNTLA TBM drive was going again. The wells were installed as close to the MNTLB CT tunnel lining as reasonably practical, but the positions were ultimately dictated by a complex site set-up, current TBM drive logistics, and a complex arrangement of structural slabs / capping beams.
Choosing positions as close as possible to the tunnel drive had the negative impact of being right in the middle of the site haul road. To overcome this, I organised and chaired pre-sub-contractor mobilization meetings, with the BMB surface team in attendance, to optimise all potential opportunities for each required set-up. We ensured there was no impact on TBM production during the depressurisation works by:
- Planning the drilling sequence and drilling support system in a manner that reduced the number / duration of set ups.
- Orientating the drilling rig in line with the haul road route.
- Ensuring an adequate storage of segments inside the acoustic shed when the rig was set up at the underside of the gantry crane, as the mast of the rig clashed with the crane.
Ideally, the full depressurisation system would have been installed from the surface, reducing programme time, costs and risk of damaging the wellpoints, but this was not possible due to the future site set-up for the Main Tunnel A (MNTLA) / MNTLB CT works inside the acoustic shed.
The surface system data was therefore used to develop the provisional in-tunnel depressurisation scheme. The impact of this additional interface with the tunnelling is detailed later in the report.
SHED SET-UP
The acoustic shed at Carnwath Road was originally constructed to enable 24-hour works during the TBM drive and then the tunnel secondary lining works in tunnel A. It was designed to store enough equipment and materials to continue production during periods when the shed door needed to be shut due to Section 61 requirements – which stipulated a finite number of hours that works could take place on site, outside of the shed and inside the shed with the doors open. During the TBM drive these stored items would include segments, locos, grout cars etc. For the secondary lining, the intent was to store a batching plant with storage bins in the shed. The additional interface created with the connection tunnel scuppered these plans slightly and major adjustments were required to the layout of the shed to accommodate the new works.
At the peak of construction activities, the acoustic shed was used to facilitate three workfaces, two of which required their own individual batching plant. MNTLA required a secondary lining batching plant and MNTLB CT required an SCL batching plant. Both operations could not utilise one plant between them due to the difference in mix design, output requirements and potential clash concrete call off. The shed also included:
- Aggregate / sand storage bins to maintain supply to MNTLB CT when the shed door was closed to satisfy Section 61 requirements.
- Muck bin with conveyor system running to the external bin.
- Dust extraction system for the SCL works.
The MNTLB CT batching plant is highlighted on the south side of the shed. Although the batcher was a mobile plant, it still typically required a large surface area when its support equipment for shotcrete batching was considered, such as steel-fibre dispenser, polyfibre dispenser, various admixture tanks and conveyors. To reduce its footprint inside the shed, we placed the admixture tanks on steel plinths in between the shed columns; this in turn allowed us to tuck the batcher into the corner keeping the haul road as wide as possible. The space created under the plinths was used for the service lines to run along the slab down the shaft and into the tunnel.
One of the biggest risks with a batching plant inside a shed that must be closed 66% of the time is control of rejected shotcrete. In normal circumstances, there would be sufficient free space in the shed to handle the material until the shed door can be opened, at which point it can be removed. We did not have this luxury therefore we had to develop a plan to reduce the risk of any rejected loads as well as the impact of any that were rejected. Overcoming this would be a key factor in production rates.
To reduce the amount of rejected shotcrete, we worked with our shotcrete supplier to set up a system on the batching plant that allowed testing prior to the load being discharged. A diverter chute was designed and fixed to the batching plant. This allowed the technician to take a sample from the mixing pan post batching / pre discharge. If the mix was too dry, water could be added in accordance with the water addition procedure developed and agreed between contractor / client / designer. With this system/procedure in place, approximately 95% of shotcrete was within spec, helping to reduce costs to our supplier and more importantly our carbon footprint.
During the previous SCL works at Tideway West, we used mobile remixers to transport the shotcrete from the batcher to the pump as we had the full shed at our disposal. This was not viable for the MNTLB CT construction, instead we used a static remixer which fitted our postage stamp-sized area in the shed, but this type of remixer does not fare well with rejected loads as it cannot be transported away from the pump location, instead it must be cleaned out in-situ under the batching plant. With the testing method described and diverter chute, we were able to dump rejected loads into a skip alongside the remixer.
RECEPTION CHAMBER THICKENING AND FALL-OUT ISSUES
The reception chamber was initially designed and constructed to receive the TBM from the central section’s main drive. Its 9.5m ID needed to be reduced to tie-in with the design of the MNTLB CT.
The reception chamber thickening was the first stage of construction and in retrospect the most challenging. The design and methodology were straight forward: apply four layers of SCL to reduce the ID from 9.5m to 8.0m. The four-layer application (59 advances) would ensure the lining thickness at each layer was manageable, particularly as the two sides of the round were of uneven thickness.
In the first 22 advances of the thickening, we had seven fall outs. After each fall-out, we discussed potential issues in workshops between contractor / supplier / designer / client to ensure and/or action various items such as:
- Checking early-age strength (EAS) results.
- Ensuring the substrate was fully jet-washed.
- Changing air supply from compressor to site mains to give a better feed with water catcher to remove any moisture.
- Accelerator dosing / calibration.
- Adapting the Spraymec control box to the more traditional Potenza control format.
- Concrete temperature met requirements in relation to ambient temperature.
- Constituent testing:
- Gradings – BMB carried out in-house test and passed.
- Cement – Tarmac forwarded and there were no obvious issues.
- Fibre counts – testing carried out and passed.
- Ensuring the length of advance was adhered to.
- Cement / accelerator reaction tests passed.
- Spraying the thinner section of the advance first, stopping to allow it to cure, then applying the thicker section.
As we actioned each potential issue, we found we were still struggling to find the root cause as the fall outs continued. After the seventh fall, I made the decision that works should cease temporarily due to the potential health and safety implications and the effect on team morale, which was at a very low ebb. The workshops proved the key to finding the root cause, as we went through all the actions already carried out, and we turned to the constituent materials within the shotcrete mix again; this time focusing more on the EAS and the admixtures. Although the EAS were passing and several constituents checked, we found that strength results were lower than historical tests from the same mix / batcher. The only other constituent we had not investigated was the admixtures, so we extracted the information from the temperature data loggers and found that the temperature had fallen to below 0°C. Two of the admixtures, Masterglenium 51 (superplasticiser used to accelerate strength gain) and Masteroc HCA 50 (retarder enabling a longer working life) have specific storage temperature requirements, 5°C -35°C and minimum 1°C respectively.
The bigger concern of the two was the Masterglenium 51. We advised the supplier to bring in a fresh batch of both products. We carried out EAS trials via sprayed panels in a simple set-up comprising six panels in total; three with the original admixtures and three with the newly delivered admixtures at 6%, 7% and 8% respectively. The trial proved successful. The difference in strength between the panels with old and new admixtures was clear. The EAS were now more suited to the accelerator percentage being used. Based on the results of the trials, we recommenced works. From advance 23-59 we had three fall outs, a remarkable difference.
PILOT TUNNEL CONSTRUCTION AND IN-TUNNEL DEPRESSURISATION
The hydrostatic pressure created by the intermediate aquifer and the inability to install a complete surface depressurisation system meant that a pilot tunnel complete with an in-tunnel depressurisation system was required ahead of the enlargement construction.
The pilot consisted of 55no. inclined, full face, 1m length advances with a lining thickness of 250mm (including initial layer). The construction brought two main challenges:
- Excavating through existing segmental tunnel backfilled with 4kN grout.
- Ensuring the required drawdown through an in-tunnel depressurisation system while trying to minimise the impact on production.
The first 32 advances were through London clay, which allowed time for a learning curve before the more challenging section of the tunnel. The final 26 advances were gradual transition from pure clay to a combination of clay and the grout backfilled MNTLB segmental tunnel, and then finally through purely backfilled grout.
The excavator was key to ensuring safe and efficient construction through the varying conditions. A Schaeff ITC 120 was chosen based on several factors:
- Used successfully on other sections of the project.
- Spatial checks during planning showed it fitted with pilot tunnel diameter.
- Very versatile / rugged machine with various attachment options (rock-wheel, pecker, muncher).
The vertical joints and 1.8m width of the segments did not tie-in well with the 1m inclined face advances. We therefore had to use a combination of attachments when excavating through the segments. The rock wheel was useful for excavating and trimming the grout and segments; a water line was connected to it to act as a dust suppressant during milling works. The muncher was useful during the bulk removal of the segments.
Despite their importance in controlling water pressure for safe construction, depressurisation systems are vulnerable in the tunnel environment. The set-up requirements for depressurisation and probing can also be overlooked. To overcome this, I planned and ensured collaboration between the contractor, sub-contractor and designer. As a result, the following key points were actioned in advance of mobilisation:
- All wellpoints and probes positioned and orientated to avoid any clashes with the adjacent MNTLB segmental tunnel.
- Spatial analysis of all potential drilling rigs to ensure the height of the mast was suitable to the diameter of the pilot tunnel.
- Well-point entry level within the pilot tunnel at an accessible height but also clear of the machinery roadway.
- Steel protection plates were placed over the wellpoints in locations where they were installed close to the excavation face.
- Installation of Visqueen-lined troughs with a fall towards a puddle pump system to control the flow of water produced when drilling for the wellpoints.
Due to the influence of wellpoint drawdown efficiency on continued advancement of the tunnel, the interface between all the relevant parties was also critical throughout construction. The Shift Review Groups were ideal in maintaining this interface but due to the 24/7 working, the three teams were in continuous contact with one another to ensure:
- Analysis of drawdown / any additional wellpoints required.
- Agreement of number of advances that could be excavated, in line with drawdown levels.
- Alignment in terms of drilling crew mobilisation for wellpoint installation intermittently.
These planning / live interfaces allowed us to maintain an efficient and safe method of tunnel construction sequence.
Although a pilot tunnel increases programme duration and costs, it can be used to the construction team’s advantage, especially in this instance. MNTLB CT was a tunnel designed and planned in a very short space of time with a very high-risk interface at the midpoint when breaking / joining into another contractor’s tunnel lining. The pilot gave the construction team an understanding of what we would be faced with when constructing the enlargement in relation to adhesion between SCL/backfill grout, backfill grout strengths and removing segment sections safely.
ENLARGEMENT TUNNEL CONSTRUCTION
Although the enlargement presented similar challenges to the pilot construction, we now had some new, extremely important construction phases to plan and execute:
- Interface with ground treatment subcontractor and depressurisation system.
- Excavating through various materials.
- Removal of last temporary ring.
- Flare construction.
Prior to commencing the enlargement construction, our depressurisation subcontractor modified the depressurisation system – diverting the pipelines from running back to pit bottom to run up the service pipe, in the crown of the pilot tunnel, to the surface.
As the enlargement progressed, several wellpoints needed to be decommissioned ahead of the advances. The number of wells to be decommissioned at each stage was dependent on the drawdown values, the drawdown target being 60.5m ATD instead of 62m ATD due to the invert level being 1.15m lower than the pilot, reducing our tolerance on pumping efficiency/ drawdown levels further.
The enlargement construction encompassed several materials to excavate. As mentioned previously, we had the benefit of having already mined through the backfill grout and segmental lining but, in this instance, we were working on a much larger scale – 8.7m OD – and had the recently constructed pilot tunnel to remove. Once again, the choice of machinery was vital to excavation. Based on previous experience with Liebherr plant, we opted for the Liebherr 924. Like the Schaeff there was an array of attachment options with this plant; we opted for the same attachments as those used on the Schaeff.
As mentioned, the vertical joints and width of the segmental lining rings in relation to the SCL top heading and invert inclined face design were never favourable to one another. This issue became more apparent toward the end of the enlargement drive, at which point the SCL tunnel had to connect in with the segmental tunnel. I identified the need to deviate from the design to reduce the risk of damaging the first permanent ring.
I developed an excavation sequence that progressively moved from an inclined face to a vertical one, which was in line with the existing segmental lining. It was imperative that the first permanent ring did not sustain any major damage, such as ripped gaskets, spalling or cracking. Through this sequence, the integrity of the ring remained intact, and the durability requirements of the design left uncompromised.
FLARE TRIAL AND CONSTRUCTION
The design of the connection point between the MNTLB segmental lining and the MNTLB CT SCL tunnel required the SCL tunnel to transition from 8.7m OD to 10.35m, and then extend past the circumferential joint of the ring by 575mm.
The original design anticipated that the flare would be fully constructed with the use of excavator and spray robot but this was a concern for me from a practical point of view. I felt a traditional approach would ensure less risk and higher quality in the section around the extrados of the ring. Due to the high importance of ensuring the integrity of the first permanent ring and quality of the sprayed shotcrete in this tight location, we felt a trial would be beneficial to confirm construction methodology. Liaising with the designer and formwork supplier, we developed a mock-up shutter of the flare on the surface at Carnwath Road using Cordek formers and RMD falsework. This mock-up shutter replicated the transition / radii of the SCL tunnel, as well as the radius and position of the segmental lining.
The spray robot was then set in position and the spray nozzle offered up to the formwork to give the nozzleman a simulation of the potential set up in-situ, albeit more favourable as it does not consider the invert or crown position. Upon carrying out the set-up, we found the following issues:
- Visibility for the nozzleman would be impaired in-situ.
- The boom / bagging of the spray robot would potentially clash with the segment.
- Nozzle range of movement was limited.
This indicated that there was high risk of a poorly compacted shotcrete lining with a high rebound content, which would have deemed the FUKO hoses (grout injection hoses used for sealing joints) redundant, as well as causing damage to the segment. Based on this, we made the decision not to carry out a wet trial with the robot; instead, we ran a wet trial with only the hand-spraying method. The sequence was as follows:
Use of the excavator around the extrados of the ring was also a high concern. The operator in the cab would be excavating blind as they wouldn’t be able to see the full excavation. The engineer would also struggle to control the profile from any safe set-up position. Once again, we felt the most efficient approach in relation to quality was the traditional one, the transition around the ring was therefore excavated by hand. I developed a plan which was then reviewed by the designer and accepted.
The shutter was then struck for inspection of shotcrete quality and FUKO encapsulation. Upon striking we found everything was within specification. Very low rebound, high-quality compaction and the FUKO hoses were fully encapsulated. This left us extremely confident of the traditional method and increased the client’s confidence in our decision.
Firstly, I broke the flare down into five advances – 88a-e. Working from the crown to the invert, each advance was excavated and trimmed using a profile board followed by the initial layer. The five advances ensured that the open time was kept to a minimum. The excavation size of the flare also suited handworks and the operative did not have to enter the excavation area, being able to remain under the previous advance.
Once the excavation and initial application of shotcrete was complete, the operatives were then able to thoroughly clean the extrados of the ring via trimming and high-pressure jet washing. The substrate was then inspected and signed off in preparation for layer 1.
The chosen construction technique for the flare proved a successful collaboration between all interested parties.
CONCLUSION
From the start of my involvement in MNTLB CT, from the design phase right through to the current secondary lining works, it has been a thrilling piece of work with challenges at every corner. By investing effort in the design, the minimal time available had limited impact on the quality of the works. When issues arose, the team rose to the challenge and figured out ways of overcoming them, the key to which was collaboration between the relevant parties and an openness to ideas.
It has been a privilege working on something so bespoke. This was not a simple, straight-lined 76m long SCL tunnel through the finest London Clay; instead, it was a complicated, formula one-style curved SCL tunnel accompanied by an in-tunnel and surface depressurisation system, and linked into an existing grout-backfilled segmental tunnel belonging to a separate sub-contractor with a connection detail that required patience and collaboration.
ACKNOWLEDGEMENTS
I would like to thank the team at BMBJV, along with designer Ramboll and client Thames Tideway West. The window to design, plan and construct the connection tunnel was small. Strong collaboration resulted in a successful construction process. Special thanks go to the BMBJV site team for its ability to adjust and reconfigure the site set-up at the height of the construction works.
